The Fine Print

The Fine Print

I am an odd sort of human, and I WILL do everything that follows.

I WILL ramble. I WILL lose topic. I WILL create metaphor chains that lead to no where, and never return to the original topic creating closure. I WILL say things that make absolutely no sense.

Sunday, September 26, 2010

Mounting the Horns

From what I have read, the stock horns only draw roughly 1 amp, whereas these Candlepower horns will be drawing 4 amps per horn.  The general consensus is that stock wiring will not handle this, and many people have evidently fried their stock wiring by going the lazy route and not using the relay.  So I am definitely going to be wiring in that relay.  Unfortunately I am extremely tight on money at the moment and the supplies for wiring the relay will have to wait till my wallet is a little thicker.  But at least I can mount them!

First I had to drill a hole in the mounting brackets(if you can call them that) that came with the new horn.  There is an extra hole that is needed for a small stabilizing tab on the bike.

Then to just bolt on the horn...
 
And there it is, horns mounted.  By far this will probably be the easy part.  In this picture you can see how the horns would look much better if I painted the front side with a chrome color paint.  All that black plastic is lookin kinda lame.  I am by far not a fan of chroming everything on a bike, but this large cluster of black plastic has got to go.

Sidenote... you can also see the turn signal stems have been replaced in this last photo.  

Horns in the Mail

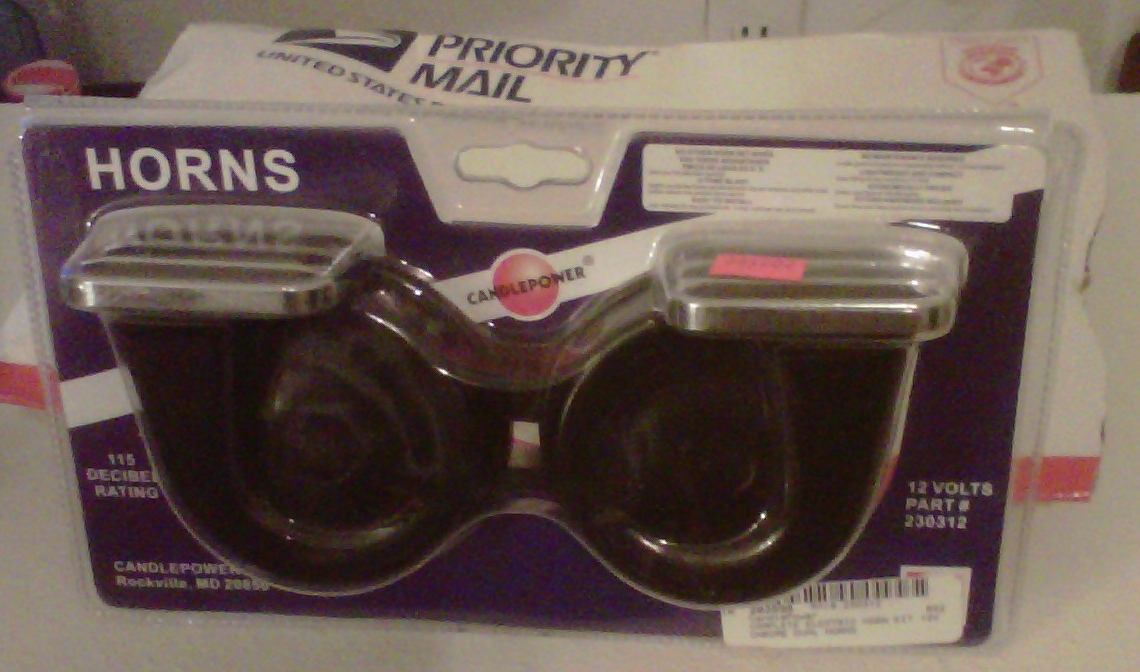
Woohoo!  New horns have arrived in the mail!
This isn't just me wanting louder horns, the previous horns didn't work at all.  These were the cheapest horns I could find that weren't the el-cheapo stock type.  They were only 32.99 on Amazon.  They are made by candlepower.  For some reason, the visible side is just black plastic and the rear is faux-chrome. 
This makes no sense to me, but when I get a little motivation it wouldn't be that hard to paint the black to a chrome look.  The drawback with this horn kit, is that I received no instructions.  You get exactly what you see in this picture-two horns and a relay.  Fortunately, today we have google, and google can find an answer to just about anything. 

Friday, September 24, 2010

Front turn signal stems

In order to get the bike registered I needed to get it inspected, and in order to get it inspected, I would need to fix that hanging turn signal you can barely see in the previous post's photo.  I really should have taken more photos of this process, but it really wasn't too dificult.  I purchased some replacement front turn signal stems from jcwhitney.

Tools needed:
-vise or hard surface and a c-clamp
-small crescent wrench and phillips screwdriver
-sharp blade
-handheld drill or a drillpress
-Letter "G" drill bit jobber length
-electrical tape

Step 1:  Unbolt the two bolts holding the headlight, and just let the headlight dangle.

Step 2:  Unscrew the speedo cable.

Step 3:  Disconnect the individual wires leading to the turn signals.

Step 4:  Remove the nut holding the turn signal/stem to the bike.

Step 5:  CAREFULLY split the tape or wire-wrap and remove it, so the individual wires are hanging out of the turn signal assembly.

Step 6:  Remove the phillips head screw holding the signal to the stem.

Step 7:  Pull the stem away from the signal, and pull the wires out, being careful with the bullet connectors at the ends of the wires.

Step 8:  Grab your new stems in a vise with the threaded side up.  The rubber is hollow, so it will crush a little bit, but don't tighten the vice until you collapse the rubber.  It is not round, so it wont spin in the vice.  (I highly suggest you refrain from trying to do the next step while holding the stem between your knees)

Step 9:  Drilling out the barrel is tricky.  If you think you can be careful, then chuck up the letter "G" drill bit and start drilling it out.  If you are too aggressive, the barrel will detatch from the rubber and spin, and you have ruined your new stem.  The trick is to just be really nice, and when you see the barrel twisting, be careful not to let it twist too far and break free of the rubber.  Don't ask how I learned this.  If you want to do it the smart way, I would start with a 1/4 inch drill(or letter "E", exactly the same drill bit), then step to an "F", then step to the "G".  Three drill bits will cost a couple bucks.  Another stem is 8 plus shipping.  Your call. 


Step 10:  Once you have opened up the ID of the barrel with the drill , you can start to reassemble.  But this is the trickiest part of the whole process.  Getting the three wires through the new stem.  I acheived this miraculous(not exagerating) feat by taping a short skinny piece of coat hanger to the longest wire.  Then taping the second longest wire and taping it to the longest wire, but below the coat hanger, and preferable inline with the coat hanger.  Then taping the third wire to the other two in such a way as to create the smallest diameter bundle as possible.  I wish you the best of luck, and oodles of patience while getting the wires through the stem.
Afterthought:  what could have been done to simplify step 10, would have been cutting off the bullet connectors, feeding the wires through, then crimping some new bullet connectors on the wires.  That would have been less stressful, but cost a few bucks more. 

Step 11:  Once the wires are through, reconnect the signal with the stem using the large phillips screw.  Once this has been reattached, you will need a roll of electrical tape, and a friend.

Step 12:  starting as close to the stem as possible, start wrapping all three wires into one bundle with the electrical tape.  Remember to leave yourself about 5 inches of unwrapped wire at the ends in order to reconnect everything.

Step 13:  Reverse steps one through four, and when you're done, adjust the headlight to the proper angle.

Another Magna Rider


Purchased this Magna August 28th, 2010.  It's a 1986 VF700C.  This is my second bike, the first being a broke-down 96 Virago 535.  Eventually I will figure out what is wrong with the Virago and with any luck convince my woman to ride it.  She thinks it is too big for her and that she will not be able to handle it.  Personally I'm not sure that bikes get much smaller than the Virago 535.  I learned on a nighthawk I think, and I'm pretty sure it had roughly the same dimensions, though I know it was only a 250.  But I am talking about the wrong bike...  The magna is really the first time I've done any real riding without a windshield, and boy did that take some getting used to.  At first I figured the problem was me.  I am somewhere between 6'3" and 6'4" depending on my slouch and how much crap I have put up with that day.  I also have very wide shoulders.  This large frame creates a very effective wind sail traveling 70 to 80 mph.  And what mast is supporting this sail?  My lower back.  Ouch.  Talk about sore.  Fortunately it seems that after several weeks of abusing my lower back in this way, my lower back muscles have gotten stronger and I only have problems on severely windy days or longer rides.  Sweet.  Cause we all know a windshield takes away from the look of the bike.